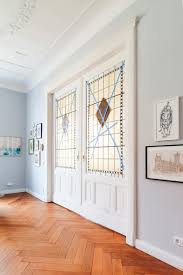
The blank walls in your home represent untapped potential—opportunities to add character, depth, and architectural interest that reflect your personal style. Thanks to the advent of DIY wall moulding kits, transforming these flat surfaces into stunning focal points has never been more accessible. These innovative products have democratized a traditionally complex aspect of interior design, putting the power of professional-looking results directly into the hands of homeowners.
Why Choose a DIY Moulding Kit?
The appeal of these kits lies in their simplicity and completeness. Unlike traditional moulding installation, which requires sourcing materials, precise calculations, and advanced woodworking skills, these kits provide everything you need in one package. Typically including pre-cut moulding pieces, strong adhesive, and detailed instructions, they eliminate the guesswork and multiple hardware store trips that often deter DIY enthusiasts. The materials—usually lightweight MDF, polyurethane, or PVC—are easy to handle and cut, making the installation process manageable even for beginners.
The Transformation Process: Simpler Than You Think
The journey from plain walls to elegant, moulded surfaces follows a straightforward process that most homeowners can complete over a weekend:
-
Planning and Layout: Begin by visualizing your desired pattern. Whether you opt for classic picture frame moulding, wainscoting, or a modern geometric design, use a tape measure and level to mark your layout lightly on the wall with a pencil. This blueprint ensures symmetry and proper placement before any adhesive is applied.
-
Preparation: Ensure your walls are clean, dry, and relatively smooth. wall moulding kit can conceal minor imperfections, significant bumps or cracks should be addressed beforehand. Gather your tools—typically just a level, measuring tape, fine-toothed saw, caulking gun, and possibly a nail gun for extra security.
-
Installation: Following the kit instructions, apply adhesive to the back of each moulding piece in a zigzag or wavy pattern. Press firmly against the wall according to your marked layout, using the level to confirm perfect alignment. Many DIYers use painter’s tape to hold pieces in place while the adhesive sets.
-
Finishing: The true magic happens during this stage. Fill any nail holes or small gaps with wood filler, then run a bead of paintable caulk along all edges where the moulding meets the wall. This crucial step creates seamless transitions that make the installation look built-in rather than applied. Once caulk and filler are dry, prime and paint your moulding—either in a contrasting color for dramatic effect or the same color as your walls for subtle texture and shadow play.
Design Possibilities at Your Fingertips
DIY moulding kits open up a world of design options:
-
Traditional elegance with classic raised panels or picture frame styles
-
Coastal charm with beadboard wainscoting in sunrooms or bathrooms
-
Modern sophistication with clean-line geometric patterns
-
Ceiling drama with crown moulding that adds height and grandeur
The Reward of Transformation
The satisfaction of stepping back to admire your newly transformed walls is immense. What began as plain, flat surfaces become dynamic elements full of character and style. This relatively simple project yields dramatic results, proving that you don’t need a contractor’s budget to achieve custom-looking interiors. With careful planning, patience, and the right kit, you can create spaces that feel thoughtfully designed and professionally executed—all with your own hands.
